
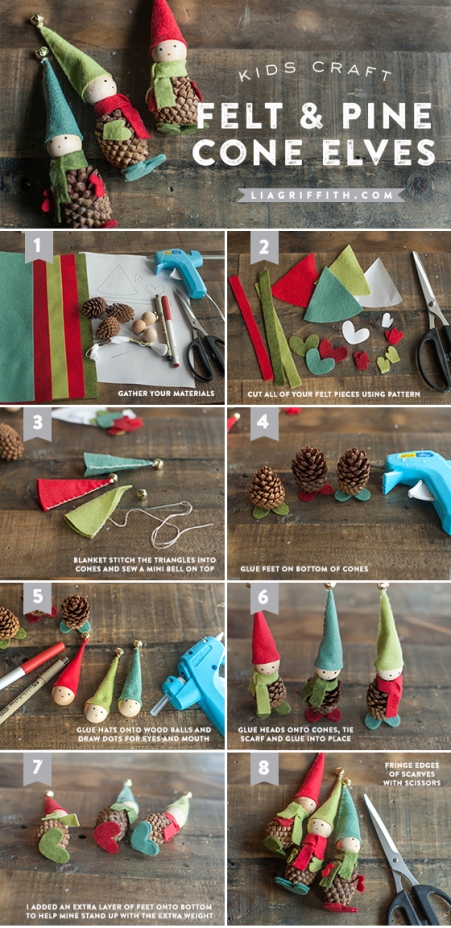
Felt and Pinecone Elves

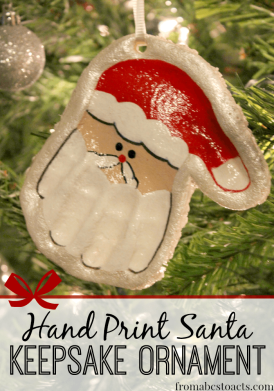
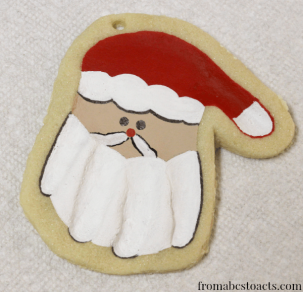
Handprint Santa Ornament
To make your own ornaments you’ll need:
- 1/2 cup All-Purpose Flour
- 1/2 cup Salt
- 1/4 cup Water
- Paint
- Mod Podge
- Ribbon
To make your salt dough, mix your flour, salt, and water in a bowl. Knead them together until you have a soft dough that you can easily form a ball with.
It will stick to whatever you set it down on so either flour your surface or place it on a sheet of wax paper.
Working quickly so your dough doesn’t start drying out, flatten it out and press your child’s hand into the dough creating their hand print.
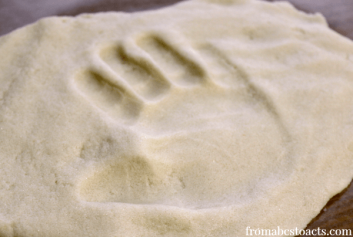
One thing to remember is that salt dough is heavy when it dries so remember that when you are deciding on the thickness for your ornament.
Once you have a good hand print, use a butter knife dipped in flour to cut your hand print out and lay it on a cookie sheet. Make sure that you cut a small hole at the bottom of your hand print so that you will be able to string a ribbon through to hang your ornament.
Your ornaments will need to be completely dry before you try to paint them so stick them in the oven at 200º for 3 hours (or until they are completely dry depending on their thickness).
Once they’ve completely cooled, start creating your Santa!
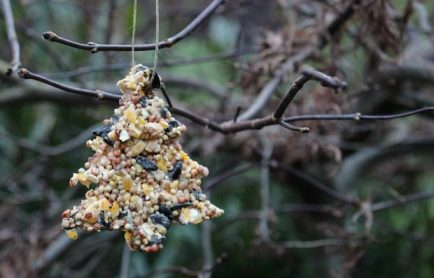
Birdseed Ornaments
Things You’ll Need:
- 4 cups birdseed
- 3/4 cup flour
- 1 envelope unflavored gelatin
- 3 tablespoons corn syrup
- Cookie cutters
- Cookie sheet
- Parchment paper
- Cooking spray
- 1/2 cup water
- 2 straws
- Twine
In a large bowl, mix together the flour, water, corn syrup and gelatin to form a smooth paste.
Slowly add the birdseed to the paste and combine until the birdseed is fully coated.
Place the cookie cutters on a parchment paper-lined pan and coat the cookie cutters with cooking spray. Spoon the birdseed mixture into the cookie cutters. Press the mixture down firmly with the back on the spoon to pack the mixture into the cookie cutters as tight as possible.
Cut straws into 3-inch segments and press the straw into the top one-fourth of the birdseed-filled cookie cutter. Make sure the hole goes all the way through the mixture. Leave the straw in the ornament and allow to dry for 3 to 4 hours.

Once the birdseed ornaments have dried, take out the straw and carefully remove the ornaments from the cookie cutters. Allow to harden overnight.
Once the ornaments are fully dry, run a piece of twine through the hole at the top of the ornament. Hang the completed ornament in a tree for the birds to enjoy!
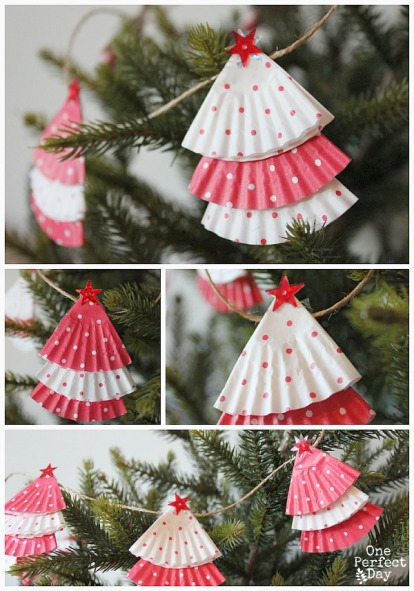
Cupcake Christmas Tree Garland
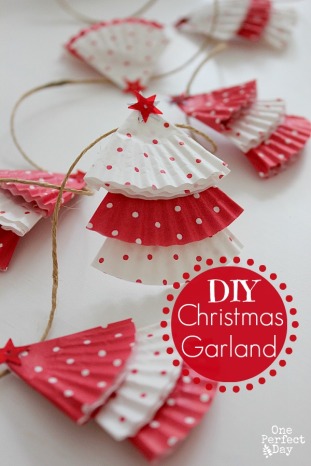
After you have made the cupcake case trees, it is then just a simple matter of attaching them to some string or ribbon. This project was all about being quick and easy so we simply taped ours to a length of string with sticky tape. You could use a hot glue gun or staple them to the string if you wanted to be a bit more professional about it.
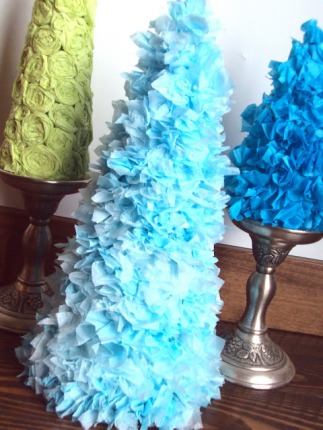
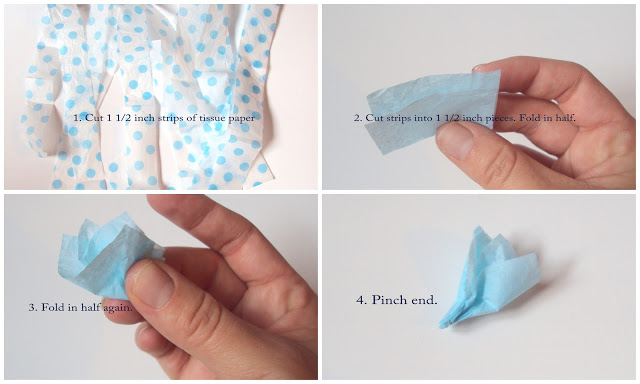
Tissue Paper Christmas Trees
For this project you will need:
*tissue paper (Ten sheets for the large tree and six or eight sheets for the small trees)
*Styrofoam tree foams
*LOTS of hot glue
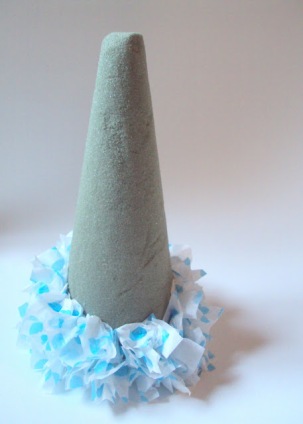
While doing this step, make sure to glue them close enough that you don’t see the styrofoam, but not so close that they overcrowded one another.
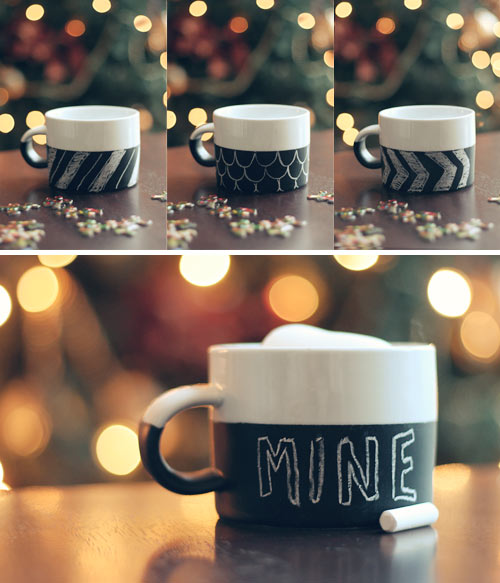
Chalkboard Mug
you’ll need:
a porcelain mug (mine is from CB2)
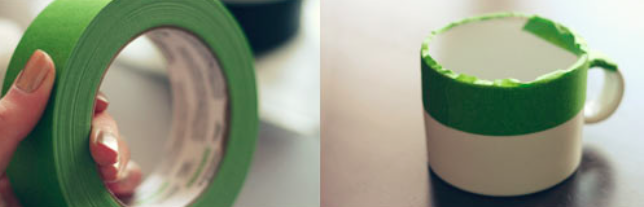
painter’s tape
Pebeo Porcelaine 150 Chalkboard Paint (available at Dick Blick or Amazon)
(Don’t use regular chalkboard paint. This only works with porcelain paint.)
a soft bristle paint brush (a watercolor brush works well)
how to:
1. Make sure your mug is clean and dry.
2. Use painter’s tape to mask off the part of the mug you don’t want to paint, 0r you could skip this step and paint the whole mug. Personally, I think it looks snazzy only partially painted.
3. Apply the paint with a soft bristle brush. If you mess up just wipe the paint away with a wet paper towel and try again. Please note that this particular porcelain paint says it’s not recommended for surfaces that come in contact with food. (Although it’s water based and nontoxic, so I don’t understand what the problem would be.)
4. As soon as you are done painting carefully remove the tape. If you remove it before the paint dries, the tape will be less likely to peel up the edges of the paint.
